Showing posts with label toddler activities. Show all posts

Tuesday, December 18, 2012

No More Guilt!

As Jewish moms, it is in our DNA to feel guilty. There are always things we can find to feel guilty about. And as Homeschooling moms, I am sure we have a few things in common.

If we are not sitting down with our kids, workbooks open, pen in hand and smiles on everyones' faces, we feel guilty that they (in our opinion) didn't learn anything.

If we are not showing flashcards to our 2 year olds and trying to "teach" them, then we feel guilty that we are not educating them.

If we spend the morning blowing bubbles and picking flowers, we feel guilty that we "wasted" the morning.

I get so many email from moms, just like you, saying these very things. They play the guilt card on themselves because they don't feel that they are "teaching" their kids.

Well, guess what. Put the guilt card away because whether you like it or not, your kids are learning. Whether you sit there with Alef Beis flashcards, or whether you don't, they will ultimately learn to read Hebrew. 

When they are little, and I am talking ages 0-6, you really do not need to be shoving information down their throats. Their little brains are so curious and are dying to just figure out everything around them. Let them!

Let them color, paint, blow bubbles, use stamps, stickers, blocks, dolls, cook, clean (yes, clean!), sweep, jump, run, climb, giggle and just be a kid. They have their entire lives to be fed information.

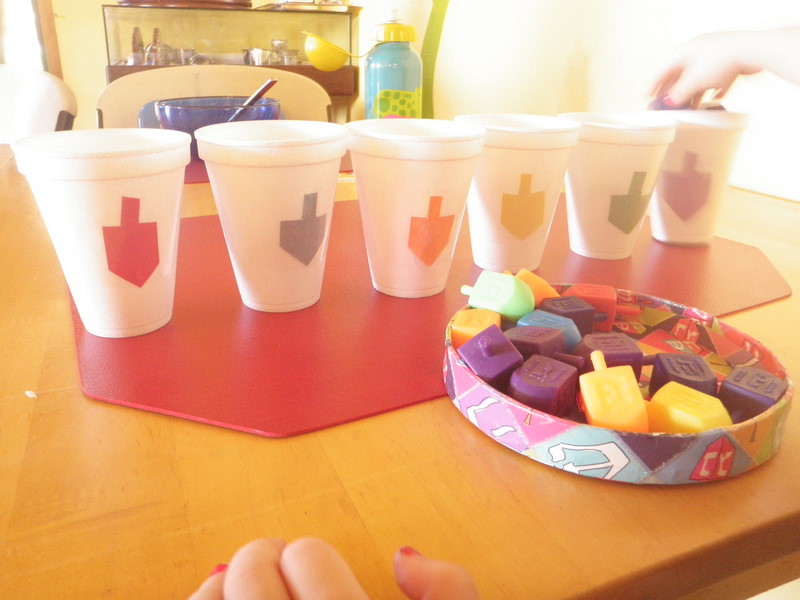
So now that you know that its not your job to feed your 3 year old facts, you can offer them lots of fun activities to do which will keep them super busy and having fun. 

A while back I made these busy bags for my tykes. Below you can print out the labels and using shoe boxes, Ziplocs, trays, whatever works for you, set out a few activities for your little ones every day. They will be perfectly happy. 


Sure, if they have the patience to sit through the story of the Parshah and do an art project, go for it! But don't feel bad that you missed out a week or two. They WILL ultimately learn about the Holidays and the Parshah as they get older!

So breathe in and out and realize that right now, its their job to play and explore and discover, and the less you help them, the better.

Here are a few great activities I highly recommend for the little ones:


We all like routine and so do the little ones. Below I have included a new Daily Routine printout that has been helping me tremebdously. It really helps me utilize each section of my day so I know I am not doing something (a load of laundry) when I shouldnt be (kids class time) and keeps the day flowing.

The nice thing is at the end of the day I can look back and see what I got done and what needs to get done the next day.

I fill it out the night before or first thing in the morning.

Here is an idea of my day:
     And here is a blank one for you to customize for your own use:

 
I am not an organized person by nature which is why I am constantly looking for ways to get more organized!

So no more guilt, much more play:)

Have a great week and if you haven't entered the Giveaway to Morah Supplies yet, you have until Monday to do so! (Click Here to Enter)

Good Luck and have a great week,
Always, 


Tuesday, March 13, 2012

Change of Plans...

Up until about a week ago, my little ones would nap every morning between 9 and 12- giving me and the bigger kids this amazing block of time to do lots of big kid stuff together.

Well, Baruch Hashem (Thank G-d), little kids get bigger, and my little ones have now moved their naps up to the afternoon.

And so, we now have 2 new little students joining us in the mornings (they could not be happier:)

The first few mornings were chaotic, to say the least... "mommy, take the baby away, she's taking my playdo"... "mommy, the baby's taking my crayons!!" etc.

I figured that I need to come up with some little activities to keep those little hands busy as well as a special blocked off place in the classroom for the big kids (which I did using bookshelves) so we can resume our usual routine-

Here are just a few things I put together that I put out for them today and they LOVED each activity, it really kept them busy. You can also click here to check out other posts I have put up on activities for toddlers.

Using the pincer grasp, they need to take the buttons out of the slots and put them in the Tzedakah Box:

I attached Velcro to wooden blocks and made a little pad with Velcro dots. They need to pull the blocks off the pad and put it into the bin through the slot:

They need to pull the pegs out of the holes and put them into the bin. I ended up getting much more pegs, they really liked this one:
This one is a bit too advanced for them, my 4 year old love it tho:
Here's to change... L'Chaim:)

Tuesday, November 15, 2011

Parshas Chayei Sara, Alef Bet and more...

Here's a great book to go along with this weeks Parshah, all about how kind Rivkah was at the well:

Keeping my 2 year old busy while we work... using large beads and pipe cleaners, he made necklaces and bracelets just like Rivkah received from Eliezer:

We made our own well with real water inside and a bucket the kids could use to retrieve water. They used little mentchies and animals to reenact the story or what happened at the well, they played with this for a while:

The more advanced version of Rivkah's jewelry for the bigger kids to make (smaller beads):

Some hands-on Alef Bet activities--

Creating letters using shapes, hammer and nails:

Creating letters with the Geo-board:

We used the Montessori Red Rods to create the letters of the Alef Bet:


Using the Sandpaper Hebrew letters, they traced it with their fingers then traced it in the sand:

This is Avraham's tent from last weeks Parshah, Parshas Vayeira:

A pretty awesome Science experiment we are doing- get 2 stalks of celery and slice the bottoms giving the water direct access to the veins. Place them in 2 different colors of water (using food coloring) and watch how the water goes through the veins in the stalks to the leaves. It took a few days but the kids loved checking on it every day:

And thats what we've been up to~
Wishing all a great week,

Monday, October 24, 2011

Parshas Noach ~ Noah's Ark (and keeping the little one's busy)

Every Homeschooler has their own set of challenges. One of ours is keeping our little one's busy while working with the big ones. Below are a few tried and true fabulous activities that we do with our very curious, very busy, very cute and very active little 2 year old:

Using 2 containers, place a bunch of rocks (you can collect them together from outside) into one of them. Place the lid on the empty container and cut a small "X" in the lid. I actually cut it from an "X" into more of a small square so he wouldn't pinch his chubby little fingers when squeezing the rocks through:

This is a classic Montessori dressing frame. Very easy to make yourself. The ones with buttons and laces were too advanced for him, but the velcro was a hit. He would open all 5 of them then close each one. He did this over and over again, really enjoyed it:

Okay- now this one is real winner. Get a basket and go around your house and collect about 6 different little bags/containers that open and close in different ways. Place a small rock/pebble/stone in each one. He absolutely LOVED this- kept him busy for a long time, opening and closing each one, trying to put some inside the other...

I'm not sure what it is about opening things and closing, and filling things up and emptying them out, but my little guy sat there for a really nice amount of time with these little tubs. They actually are part of the older kids alphabet tubs which I will post one of these days, but I gave him a few of them to play with. He opened them, emptied them, played with the contents inside, loved seeing what each tub had, stacked the tubs on top of each other, knocked them down, you name it, he is in his own little world having a ball.

Just get a few containers with lids and fill each one up with 2-3 little goodies. Could be anything little. Little hands like holding little things. Instant winner.

And what 2 year old doesn't love making noise? This was quite the hit... gave me a bit of a headache, but to see him sitting there banging away was quite delicious to watch:)
In is defense, he had been sitting at the kitchen table for almost an hour doing his little activities- the attention span was coming to a close, so I figured, lets end this with a bang!

... meanwhile

The older munchkins were busy with their own set of activities-

Since we are learning about Parshas Noach this week (Noah's Ark) we are focusing on Animals, the Ark and Rainbows. So any activities we do are somehow tied into those themes.

These animals are from a lacing set. My kids aren't so into lacing so we tried something a little different. Using thumb tacs on a cork board, they pushed the tacs through each hole.
Voila, a great activity~

A Rainbow Sensory Tub- we used colored rocks (used for fish tanks), colored pom poms, colored feathers, colored springs, a miniature sun, umbrella and rainbow and of course, a magnifying glass. Oh- and a few little miniature people in there as my 4 year old LOVES sensory tubs and always makes a whole story with all the goodies in there so we always include 2-3 little people.
I put the bowls and spoons on the side for them to use with the tubs if they wish.

Picking up miniature animals with tongs and placing them in the "Ark":

Feeding the chickens and ducks corn kernels, using a mustard spoon and transferring them from one dish to another:

Spelling 3 letter words, using the moveable alphabet and a basket of animals (cat, dog, cow, rat):

Building an Ark using shapes, hammer and nails:

Sorting the people, animals and food into the Ark:

And thats pretty much what we have been up to so far- any other goodies and printables I will post when I get a chance~

A great week to all,


Wednesday, February 16, 2011

Some fun activites

Some fun activites that have been keeping the kiddos busy...

Alef Bet wheel, you can add different vowels as well as use pegs to match up the letters. Great for beginners in letter recognition.
Same idea, just with colors:
Used an ice tray and rubber erasers, color sorting. I had tongs but my munchkin got impatient and just used her fingers to place the erasers in each correct hole:)
Beading with pipe cleaners- they can match the beads to the same colored pipe cleaner or make their own design...
Now this was a HUGE hit: Made 2 felt boards using a picture frame and felt (got this amazing idea here), then cut out different shaped eyes, noses, mouths, hair and hair accessories and the little ones created all types of faces, over and over again-
The felt boards:
Self portrait of the little guy:)
Classic Cheerios book with Cheerios... we didn't do this in a long time, so it was fun.
Movable Hebrew Alphabet with board- another great hit, the little guy made tons of words, it was fantastic...
and lastly, Counting Chocolate Chips- you can use anything, really. This is more for number recognition and counting for little ones- you can make lady bugs with spots, bees with stripes, get creative:)
And thats what we were up to today...
Hope to create and post more soon, wishing all a wonderful week,

Wednesday, November 24, 2010

I have a little Menorah, I made it out of clay:)

The great thing about this clay Menorah, is that the kids get to make it literally from scratch.

Here's the clay recipe:
3 cups flour
1 cup salt
1 cup water (plus a little extra if needed)

Mix all the ingredients together until it forms a nice smooth dough. I found that we needed to add some water along the way to get the smooth doughy consistency. The recipe said you can add food coloring but I found it just stained the kids hands when handling the dough which was not too exciting.

Preheat oven to 275.

Once we had our dough, we made a base for the menorah, made 8 round balls and used actual Chanukah candles to form little holes to put the candles in. Make sure to make the holes a bit bigger then the size of the candle, as it shrinks a drop in the oven. Use water to "glue" the holders to the base and the shamash.

Place menorah in the oven on wax paper for 1 hour.

After an hour, take it out and let it dry completely, then paint with acrylic paints. As you can see, ours turned into a finger painting session:)

Here's the finished product:


We then did dreidle sorting into the different colors with the little ones- I have a printable of colored dreidels here, feel free to use it-

This is what we did:


Wishing everyone a happy Turkey day:)