This planner has Hebrew and English dates, meal and snack ideas, Shabbos menu ideas, a Shabbos checklist, a household maintenance list, a grocery list and for each day there are several lists- to do before 11 am, appointments, to do, to email, to call/text, to delegate and other. Each day has a Torah thought for the day, an inspirational quote, a checklist to make sure you are drinking enough water, exercising, davening, reflecting. Honestly, I have no idea how Liba Andrusier managed to fit this all into one gorgeous planner but it is just genius.
You can literally sit down in the morning and see your entire day planned out before your very eyes in full detail.
So while I suggest you hop over to Jewish Mom's Plan-It! website and buy yourself, your sister, your mom and your best friend a copy, Liba has generously agreed to give one very luck lady her very own copy in a Jewish Mom's Plan-It! Giveaway!
It really helps to write things down and stick it up on the wall for you to see your own thoughts and whats going on in your life as well as whats going on in your mind.
This applies to how we run our homes and our Homeschool.
Here is a Mini Jewish Homeschool Preschool Planner- it will help give you an overview of your month, week and day. I have included a black and white copy. I hope it helps you organize your thoughts and helps in your Jewish homeschooling experience!
And if you haven't yet entered the Dot by Dot Giveaway, Click Here for a chance to win a copy of their fabulous Dot by Dot Hebrew Reading Book, Volume 2. Good Luck!
As each year goes by, I am not sure about you, but my list of lists for Pesach seems to grow and grow. I feel like I am constantly writing things down so not to forget things and end up with a bunch of scrap papers that I need to go through at the end of the day to sort out what needs to get done and when.
I printed it out and put it in a binder. It is literally a bunch of blank lists that I fill in for Pesach through out the month and it gives me a lot of sanity. I have it on my kitchen counter and as things come along, I plug it into the appropriate list. If I think of a good idea for a meal, I stick it in one of the menus. You get the idea. Now all my lists and ideas are all in one place, and so is my mind.
The Simple Pesach Planner includes:
*A one month calendar for the month before Pesach
*A one week calendar for the week before Pesach
*A Kids Menu for the week before Pesach (so our kids don't starve while we stress out)
*A cleaning list
*A shopping list sorted by types of products
*A guest list
*Seder preparation list
*To Do list for day before and day of Seder
*Table setup
*Yom Tov preparation list
*Delegation lists to give out to those helping you
*Seder Menus
*Yom Tov lunch Menus
*Chol Hamoed Menus
*Shabbos Menus
*Last day Yom Tov Menus (Dinners and Lunches)
Feel free to print out whatever lists work for you-
Enjoy your week, dont get over whelmed and dont forget to breathe...............
After WEEKS (or for some of us, MONTHS!) of cleaning, organizing, shopping, planning, cooking, baking, and endless preparations--- we did it. We all made it through another Pesach.
I often smile to myself when I think of how happy us Jewish ladies make our creator during this hectic time. I mean, ALL of this work for just 8 days of the year. It's pretty amazing. WE are pretty amazing.
And as nice as it would be to be able to take a little breather (aka- vacation) to recover from all the hard work, life must go on. Which means more lists, more planning, more organizing, to keep our precious families running as smooth as possible.
It was nice to take a break from life's routine over Chol Hamoed and take the kids out on a few 'special' trips. My crew are still young, so bumper boating was about as exciting as it got, but the kiddo's had a ball and that's all that counts, right?
But in the back of my mind, I knew that once Pesach was over, life will go on as usual and so I made these Workplan Templates to try out for the remainder of the school year.
It is actually very simple: One is an overview of the month. You write down any holidays and special dates happening that month. You can then fill in different activities in the different subjects provided giving you an idea of what you can cover over the next month. The second one is the same thing but with Parshah. You just plug in the Parshah name and any activities to do for that Parshah. The nice thing is, you don't need to write in every single box, and it will give you a good idea of the areas you are covering more then others.
Click HERE to download the clear Template and print it for yourself. You can laminate them and use them each month, or print and fill it in each month to have for your records. We're just trying it out. If it works, we will use them for next year.
That's a big thing about Homeschooling (at least in the early years). You are CONSTANTLY trying to figure out what works and change the things that DON'T work.
Here are a few things I've been pinning on Pinterest for Lag B'Omer and Shavuot. Some things are mine from this blog, some are from others. I'm a very visual person, so seeing all the different crafts and activities we have done over the years on one screen is really helpful!
I would love to hear some of your good ideas for Sefirat Ha-omer charts, Pesach Sheini activites, Lag B'omer projects and of course, Shavuot~ got a good (and EASY) cheesecake recipe? Send it to me- I'll post it.
Wishing you all a great week, and an easy transition back to the daily grind...
Many years have gone by where I have made these incredible Pesach Seders for over 100 people, tons of delicious food and everyone walks away happy and full.
Comes CholHamoed and the next thing I know, my family are all hungry and I have to figure out what to feed everyone.
Well my friends, this year, I am gonna be one step ahead of the game! Tonight I made my CholHamoed *tentative* menu, and I say tentative because I know that some of my kids will be eating the same things every day for a week no matter the options- but I say better have and not need, then need and not have! I tried to include as many fresh fruits and veges where ever I could... so when they're snacking on all that yummy chocolate and those Pesach brownies, I won't feel so guilty;)
Here are a few more Chanukah activities that we have been doing over the past few days:
Made a dreidel out of ICE by pouring water into a plastic dreidle that usually comes with candy inside- the little guy really got a kick out of trying to spin it since it was so cold:)
We then made a Menorah out of Legos, he did this all by himself, very proud mama!
So I figured I would turn it into a post, maybe it could be useful to others!
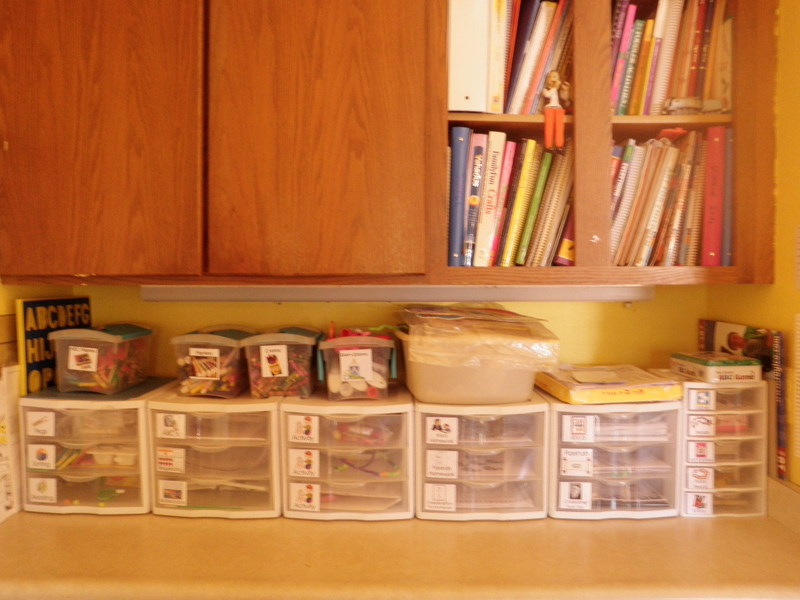
The truth is, I would love to say that I have a planner and sit down every week and make a plan for the week- but I don't. We have alot going on in our busy lives with some very unpredictable little ones at home and so I found a system that really works for us right now- this is it:
Every Sunday I fill the drawers with new activities and worksheets that I either made or from the Jewish curriculum resources on the side bar that I listed.
Then as the week goes by, I will refill them with new things. Its a nice way to organize, kind of a tweak on the Workbox system.
We also do ALOT of things spur of the moment, like baking and projects, games, etc.
I think that as the kids get older I will have a more organized schedule and curriculum, but for now, this really works for us!
We made a project for this weeks Parshah, parshas VaYishlach. The munchkins colored a picture of Yakov meeting up with Eisav. Then we made a little wheel that pokes through a window on the paper showing the 3 things Yakov did to prepare to meet up with Eisav (prayed to Hashem - drew a Siddur, sent Eisav gifts- colored goats and sheep and prepared for war- colored bows and arrows). The little guy loves turning the wheel to see which picture shows up in the window...
Here is the full project:
This is just a little activity I did with Munchkin to help her practice coloring inside the lines:
Using pipe cleaners, I made them into shapes and glued them onto index cards. She then took markers and colored them in. She loved it:)
And here is just a peek inside our little Workboxes... I find it a great way to keep organized and to plan for each day:
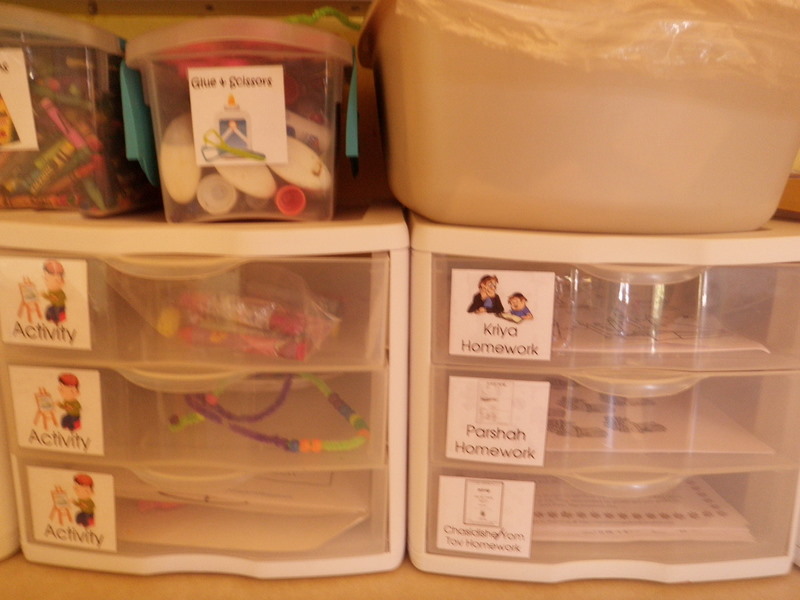
The night before, I put a different activity in each drawer with any supplies they will need for the activity. Here are 3 examples:
A Beading Activity: I put the pipe cleaners shaped as dreidles with the beads in the drawer. The drawers come out, so I just put it out next to them.
A Chanukah Stamping Activity: Stamps, Ink pads and paper are all inside. Menorah Activity: Paper, Popsicle sticks, tissue paper flames (under the paper) and glue...
One of our favorite activities is gluing- here is a little Menorah that we made out of the Popsicle sticks. I gave each munchkin a piece of colored construction paper with an outline of a Menorah. They each got Popsicle sticks and glue and glued each stick onto the line I drew. They then took yellow tissue paper and cut out flames to glue on... and voila:)
We also did a lot of practice with our Hebrew reading, as well as lots of singing and dancing to our favorite CD "Morah Music: Music and Movement"
We have a few of her CD's, the kids absolutely love them and all her songs of filled with information.
And so, thats been our week so far!
Oh, and today is the LAST day to vote for me in the Homeschool Blog Awards, so if you haven't yet voted (and if you have, thanks!!!) please take a minute, and vote for me! Vote Here!
So I found a fabulous weekly planner somewhere in my files. I have no idea where I got it but it looks perfect for us and the way our week goes.
Because we dont have a strict routine, I like this planner because it just highlights what I want to get done. It dosnt matter when or how long each activity takes, but as long as it is done over the week, by Shabbos, then I know I am in good shape!
Now it is just a Theme Planner, meaning that it is planned around the weekly Parshah or Jewish Holiday. It does not include Hebrew Reading or writing, although I would like to incorporate that at one stage. For now, here it is:
A small glass or cup of water to float the cork and needle.
How To Make It
Your compass will work better if you first run a magnet over the needle a few times, always in the same direction. This action 'magnetizes' is to some extent.
Cut off a small circle from one end of the cork, and drive the needle through it, from one end of the circle to the other, instead of through the exact middle
Float the cork and needle in your cup of water so the floating needle lies roughly parallel to the surface of the water.
Place your compass on a still surface and watch what happens. The needle should come to point towards the nearest magnetic pole (north or south as the case may be)
If you want to experiment further, try placing a magnet near your compass and watch what happens.
Notes:
The earth produces a magnetic field. This field, although weak, is sufficient to align iron and other paramagnetic compounds such as your needle within it. By floating the needle on the cork, you let it rotate freely so it can orient itself within the earth's magnetic field, to point toward the north or south poles of the planet.


