Monday, October 31, 2011

Parshas Lech Lecha- Stars and Transportation

Here are a few things we have been doing in connection to Parshas Lech Lecha:

Aside for My First Parshah Reader, we are reading A Little Boy Named Avram by Dina Rosenveld.


We printed some coloring pages from Chinuch.org and Munchkin colored them and stuck on star stickers while we were talking about how Hashem promised Avraham that his children would be as many as the stars in the sky.

Then, using Star cut-outs which I got at Walmart for $1, I cut them up to make little puzzles and stuck a magnet sticker on the back of each piece. We took all the pieces, mixed them up in a basket and the kids used a magnetic cookie pan to put the stars back together again. The nice thing about using the magnets is that the puzzle pieces stay in place once put down.

Here is a math activity using the Montessori beads. Pretty straight forward. You can make your own beads using pipe-cleaners and colored beads.

A great counting activity, stick the correct amount of Star stickers as the number written on each star. My Munchkin (3.5) LOVES stickers, so anything with stickers is an instant winner with her.
Creating a night sky with different types of star stickers, some foam, some glittery and all different sizes. She actually made a pretty awesome sky, overlapping stars, mixing colors. It was very cool:)
Simple beading with star beads.

After working with stars, we moved on to Transportation- "Lech Lecha", Avram and his wife "traveled" to Canaan. So we are learning about all things connected to modes of travel.

Cutting activity with cars using the Kumon Cutting Workbook.

Transportation Sensory Tub, using black rice we picked up from the local Health Food store in bulk. We put in some Lego street signs and Toob Cars. This was SUCH a hit with my 2 year old, he sat there for quite a while burying all the cars then trying to find them.

Then what started as a simple sorting activity, turned into this:

Taking the idea from my little one, we used the sensory box to hide all the cars, planes and boats and the older kids would search for them and once found, place them in the correct section.

Then using big blocks, cars, street signs and little people, they each designed there own roads.


Using chalk, they drew streets on black construction paper and used these transportation stickers to create a whole scene.


This was a kit we got and they made boats, trains, cars and planes.
Here is where you can get some of the products we are working with this week:
A great week to all~

Tuesday, October 25, 2011

Noach Activity Pack and some more activities...

I like incorporating the weekly Parshah/Holiday into our regular secular subjects. Below you will find a few math activities, reading and science activities that we have done. I have also included a Noach Activity Pack which includes some of the papers we used for the activities. Feel free to print some or all of the printables.


Counting Doves (in connection to the Dove that brought back the Olive Branch). We made these doves out of white felt glued on to card stock then cut each one out:

Matching the upper case letter to the lower case letter- each letter is the beginning letter of each animal:

Counting animals using clothes pegs:

This was a cute science experiment we did. We discussed the difference between fresh water and salt water. We then made 2 identical cups of water, one with A LOT of salt, the other, just water. We then took 2 eggs (boiled or raw, both work) and dropped them into the cups:

Check out what happened- the egg sunk in the fresh water and floated in the salt water.

Well, that's about it for now on Parshas Noach- have a great week!

Monday, October 24, 2011

Parshas Noach ~ Noah's Ark (and keeping the little one's busy)

Every Homeschooler has their own set of challenges. One of ours is keeping our little one's busy while working with the big ones. Below are a few tried and true fabulous activities that we do with our very curious, very busy, very cute and very active little 2 year old:

Using 2 containers, place a bunch of rocks (you can collect them together from outside) into one of them. Place the lid on the empty container and cut a small "X" in the lid. I actually cut it from an "X" into more of a small square so he wouldn't pinch his chubby little fingers when squeezing the rocks through:

This is a classic Montessori dressing frame. Very easy to make yourself. The ones with buttons and laces were too advanced for him, but the velcro was a hit. He would open all 5 of them then close each one. He did this over and over again, really enjoyed it:

Okay- now this one is real winner. Get a basket and go around your house and collect about 6 different little bags/containers that open and close in different ways. Place a small rock/pebble/stone in each one. He absolutely LOVED this- kept him busy for a long time, opening and closing each one, trying to put some inside the other...

I'm not sure what it is about opening things and closing, and filling things up and emptying them out, but my little guy sat there for a really nice amount of time with these little tubs. They actually are part of the older kids alphabet tubs which I will post one of these days, but I gave him a few of them to play with. He opened them, emptied them, played with the contents inside, loved seeing what each tub had, stacked the tubs on top of each other, knocked them down, you name it, he is in his own little world having a ball.

Just get a few containers with lids and fill each one up with 2-3 little goodies. Could be anything little. Little hands like holding little things. Instant winner.

And what 2 year old doesn't love making noise? This was quite the hit... gave me a bit of a headache, but to see him sitting there banging away was quite delicious to watch:)
In is defense, he had been sitting at the kitchen table for almost an hour doing his little activities- the attention span was coming to a close, so I figured, lets end this with a bang!

... meanwhile

The older munchkins were busy with their own set of activities-

Since we are learning about Parshas Noach this week (Noah's Ark) we are focusing on Animals, the Ark and Rainbows. So any activities we do are somehow tied into those themes.

These animals are from a lacing set. My kids aren't so into lacing so we tried something a little different. Using thumb tacs on a cork board, they pushed the tacs through each hole.
Voila, a great activity~

A Rainbow Sensory Tub- we used colored rocks (used for fish tanks), colored pom poms, colored feathers, colored springs, a miniature sun, umbrella and rainbow and of course, a magnifying glass. Oh- and a few little miniature people in there as my 4 year old LOVES sensory tubs and always makes a whole story with all the goodies in there so we always include 2-3 little people.
I put the bowls and spoons on the side for them to use with the tubs if they wish.

Picking up miniature animals with tongs and placing them in the "Ark":

Feeding the chickens and ducks corn kernels, using a mustard spoon and transferring them from one dish to another:

Spelling 3 letter words, using the moveable alphabet and a basket of animals (cat, dog, cow, rat):

Building an Ark using shapes, hammer and nails:

Sorting the people, animals and food into the Ark:

And thats pretty much what we have been up to so far- any other goodies and printables I will post when I get a chance~

A great week to all,


Monday, October 17, 2011

Torah, Torah, I Love You...

"Little Torah, Little Torah, Let me hold you tight!

Teach me, Teach me, all your mitzvot so I can do them right!

The Torah teaches every Jew, Torah, Torah, I Love You!"

Simchat Torah is such a fabulous Holiday- the reading of the Torah goes on portion by portion throughout the year, throughout the ages, in everlasting cycles. The Torah is concluded on Simchat Torah, but it is also immediately started again from the beginning. This shows that there is no end to the Torah and that it must be read and studied constantly, over and over again.

And so here are a few things we have been doing~ preparing for the great celebration!

We spoke about how a Torah is written on Parchment using a Quill and ink... then we used a feather and paint to create our own "quill and ink" experience:


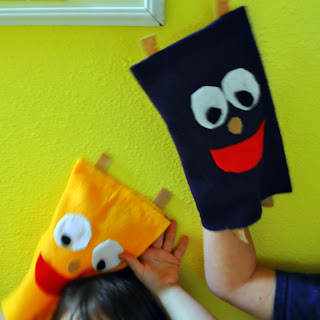
Then, what started out as this project which I got from Chabad.org to make your own stuffed Torah from felt...

...turned into the most adorable Torah puppets- thanks to my 2 year old who found the Torahs drying on the table with the bottom part not yet sealed... he stuck his chubby little hands in and before we knew it, everyone had their own Torah puppet! It was such a hit- they made a whole puppet show singing all the Torah songs they know. So much for the little stuffed Torahs, but I guess there's always next year:)

Of course, we made Simchat Torah flags... and being the Montessori inspired mom that I am, I gave each munchkin a piece of white card-stock with a glue stick and put a box filled with all types of goodies in the middle of the table giving them the freedom to make their very own original creations...

Once completed, they went outside and each found a strong branch to use as the stick for the flag. We taped it on with strong packing tape and are keeping it on the wall until Simchat Torah.

Here's a little game that the munchkins actually made themselves. We used a paper plate and cut it into a smaller circle. Using a marker and a ruler (my big guy LOVES using rulers), we divided the circle into 6 sections. My big guy stuck little Torah Stickers in each section numbering 1-6. We then took paper clips and stuck the numbers 1-6 onto each one:

He then gave it to his little sister and explained to her how to clip the correct number on the paper clip to the correct amount of Torah's on the chart:

Good job kiddo!


Here are a few other toys and books we have been using in connection to Simchat Torah:

This is also a great link to adorable songs on each Parshah- and since we are starting at the very beginning next week, I thought some of you might enjoy using it as you teach each weeks Parshah to your little ones.

So hope you have a wonderful and happy Holiday,

Always,


Tuesday, October 4, 2011

Yom Kippur Activites

Here are a few things we're doing this week to prepare for Yom Kippur:

The classic craft for Yom Kippur- Slippers: made from foam with sticky backs. Have the kids trace each of their feet on a piece of foam and cut it out, a little bigger then their actual foot...

Let them decorate another piece of foam and cut it out like below:

There is a piece of paper on the back of each piece of foam. There are 3 tabs, 2 on each side and one on the top. You will use these to stick to the bottom of each foot cutout. Peel the paper off the back of each tab leaving the rest of the paper on the foam so it doesnt stick to the kids feet. Fold the tabs over the foot cutout, press down to stick, and voila... got some nice looking Yom Kippur slippers!

The nice thing about the sticky foam (you can get it at Walmart or any craft store) is that the sticky part STICKS. No glue or staples are needed and the kids can use them right away.


Next we made a Tashlich pond...


Using a plate filled with water, shave different colored chalk into the water. You can let the kids use a plastic knife to shave the chalk.

We cut out little fish from white paper and the kids dipped each fish into the water for a few seconds then laid it out to dry.

And here you have the finished product... you can do this with anything, the chalk creates a really cool effect.


Click Here to download My Yom Kippur Activity Pack


Should be a great week and an easy fast to all~

Oh, and for those who are making Kreplach, you can use ready made won-ton dough, just fill it with filling and drop into the soup to boil. It comes out great and its super easy!